Monday, April 6, 2020

Tierfon Mission: Territory

When a Bothan spy is captured in Hutt Space, it's up to the PCs to stage a rescue.


Star Wars: Age of Rebellion: Territory
There's an old saying that “knowledge is power.” Now, as the Rebel Alliance has regrouped its fleet following the evacuation of Yavin base, officials in the High Command are seeking any and all information that could given them an edge, including details for previously secret hyperspace routes around Hutt Space. In fact, a Bothan spy given that very task has been captured by a Hutt crimelord, and High Command wants to rescue him. To that end, they've brought in a Special Operations team from Tierfon Base.

Adventure Summary
This mission begins with the PCs hunting boma beasts on the Dxun Moon of Onderon. From there they are invited to a secret rendezvous with the Rebel fleet around Orto Plutonia, where they are briefed for a mission in which they are tasked with infiltrating the court of Slarr the Hutt. Bringing the beasts gains them entry, where they can learn of the Hutt's nefarious plan to execute the Bothan. At that point—and with Imperial forces on the way, too—they must take daring action to rescue the Rebel operative.

Planning and Preparation
In this case, the PCs have time to plan and prepare during the middle of the first episode; they should start the scenario in media res, with no time to make adjustments, to increase the drama of the situation.


Involving the Player Characters
As mentioned above, the PCs should start this scenario on the Dxun Moon of Onderon, set up to hunt a pair of boma beasts; they can ask questions about why they're doing it after the fact.

Mission Objectives and PC Duty
Detailed below are some of the ways in which this assignment can tie into different characters' objectives.


  • Combat Victory: This mission provides numerous opportunities to fight against the enemies of the Rebel Alliance.
  • Counter-Intelligence: Rescuing the Bothan spy is definitely an opportunity to prevent him from revealing valuable information.
  • Intelligence: Moreover, acquiring the information the spy discovered would be of huge benefit.
  • Internal Security: This is a chance to make sure the Spec Ops team completes its mission, and to silence the spy if necessary.
  • Personnel: It is up to this Rebel to make sure that no being is left behind on this mission.
  • Political Support: Acquiring new hyperspace routes could open pathways to systems in which the Alliance has not previously been active.
  • Recruiting: Possibilities for recruitment come with opening new systems, too.
  • Resource Acquisition: The same goes for acquiring raw materials, equipment and other goods.
  • Sabotage: This mission provides a chance to harm the Hutts, and possibly to the Empire as well.
  • Space Superiority: There's a good chance for some space combat on this assignment, too.
  • Support: The PCs need to work together during this mission if they are going to succeed at it.
  • Tech Procurement: Recovering the Bothan spy's Y-Wing fighter and Astromech droid are a definite victory for the Alliance.

Episode 1: Hunters and Hunted
As mentioned above, this scenario begins with the PCs hunkered down on the Dxun Moon of Onderon, hunting for boma beasts—and with the explicit instructions to capture them alive. They are stationed on the edge of a clearing, with a live nerf tethered in the middle of it as bait. The PCs should make Stealth or Survival checks to conceal themselves, opposed by the beasts' Perception efforts.

Boma Beasts (Rivals): Refer to page 36 of Operation: Shadowpoint for stats.

This should present them with an interesting challenge, and one that sets the scene for their meeting with the Rebel fleet.

Rendezvous at Orto Plutonia
Once they've bagged the boma beasts, the PCs are directed to coordinates in deep space close to the Cularin System. There they are met by a Nebulon-B frigate, the Castellan, where their ship is inspected and then they are instructed to connect with its docking tube. From there, then, the frigate jumps to hyperspace headed for Orto Plutonia and the rest of the Alliance Fleet. Even though this assembly of ships is depleted by losses suffered during the Battle of Scarif, this should still be an impressive sight, a glimpse into the larger structure of the Rebel Alliance than the PCs have seen before: CR90 corvettes, Hammerhead corvettes, GR-75 Medium Transports, various starfighters, and other vessels.

Briefing
Once the Castellan is back with the fleet, the PCs meet a new officer, General Davits Draven. He thanks them for their previous service to the Rebel Alliance—and can even name some specific details, at the GM's discretion—before presenting them with the following details about their new assignment.
  • Recently Alliance Intelligence sent a Bothan spy, Evnik Ral'lya, to scout new hyperspace routes around Hutt Space, ones that could provide new inroads into surrounding systems.
  • He was captured by mercenaries working for Slarr Uwanesh Diann, a Hutt crimelord.
  • Currently he is being held in the Hutt's stronghold on Nal Hutta.
  • Alliance Intelligence believes that Slarr is planning to execute the Bothan as part of an elaborate hunting competition, as he has used this means for other enemies in the past.
  • For that reason they wish to send the PCs, with a gift of Onderonian boma beasts, to visit Slarr's court, attend the hunt, and thus rescue Ral'lya and recover his ship and Astromech unit.

At this point the PCs are free to ask any questions they might have, although there isn't much additional information available. They can also request any equipment which they deem necessary, including clothing for disguises, at the GM's discretion. Finally, they should work together to establish whatever aliases they need; this might require using the Computers skill to forge fake identification. 


Episode 2: In the Hutt's Court
Upon arrival at Nal Hutta and approaching Slarr's territory, the PCs are hailed by the Hutt's minions and asked to identify themselves and declare their business. This is a first test of their aliases and cover stories, if not a particularly pressing one. As long as they keep their composure, they are directed to land their vessel on one of the (by now familiar) landing pads located throughout the swamp around Slarr's stronghold. 


Slarr's Stronghold
At the landing pad the PCs are met by a pair of skiffs from the stronghold; they can load the boma beasts and themselves aboard, and then are taken to the stronghold. 


Slarr's stronghold is a tall, circular structure with a domed roof flanked by four tall towers. It has broad, warship-grade blast doors in front (1) that open into the entrance hall (2). That, in turn, is flanked by a guard post (3) and the stronghold's comm center (4), the door to which is always kept locked. The hall then opens into Slarr's audience chamber (5), with his dais in a prominent position. Six doors lead out of that chamber, with hallways leading to a guard barracks (6), servants' quarters (7) and kitchen (8). Slarr's personal chamber is located in the rear of the building (9), and there are sleeping quarters for guests (10) along with spiral staircases leading up into the guard towers (11). On the lower level, accessible via the stairways in the towers, one can find a torture chamber (12) and cells for prisoners (13), along with additional guest quarters (14) and the stronghold's repulsor-garage (15), in which are kept Slarr's sail barge and a pair of skiffs. 


Developments
Once the PCs arrive in Slarr's court, the situation can develop in many different ways; detailed below are a few of the more likely possibilities.
  • The PCs are met by Eom Nivlem, the Gran majordomo, who takes them to meet Slarr. As visitors, they are expected to treat a Hutt with great respect. This can be handled by a PC making a Negotiation check versus Slarr's Cool, or a Deception effort opposed by his Disipline. The PC should receive a boost die for presenting the boma beasts, along with other bonuses or penalties for good or bad reasoning or roleplaying, at the GM's discretion.
  • The result of this effort, then influences just how much leeway Slarr is willing to grant the PCs during the leadup to the hunt.
  • After the PCs present the boma beasts, a group of guards leads them down to an emptied guest room (14) on the lower level; asking to accompany them—to make sure the beasts are safely delivered, of course—could be a good excuse to look around a bit. While the doors to various rooms are kept locked, small windows can provide a glimpse of their contents.
  • The PCs could also ask for a chance to rest and recover a little bit before the hunt, granting them access to guest quarters in which they can make their plans and preparations without the risk of being observed.
  • They can also interact with Tenrep Cray, Traborn Yerg and Tescali Ru, other members of the Hutt's court, and thus maybe learn more about Slarr's business.
  • This is also an excellent opportunity for the GM to introduce other characters who can provide plot hooks for future adventures.

Unexpected Guests
Having heard through their own channels that Slarr the Hutt has captured a suspected Rebel operative, the Imperial Security Bureau sends an agent, Lieutenant Ennis Dul'Tir, to investigate the matter. He arrives accompanied by a squad of Imperial Army Troopers in plain clothes and a Vehicle Corps Pilot.

Imperial Army Troopers (Minions): Refer to page 418 of the core rulebook for stats.

Imperial Vehicle Corps (Rival): Refer to page 419 for stats.

Lieutenant Ellis Dul'Tir: Use the stats for an Intelligence Agent from page 419.

For their part, the Imperials inquire about the prisoner and ask to join the intended hunt. In doing so, they might have a chance to interact with the PCs, thus subjecting them to a greater test of their aliases and cover stories—something that requires a Deception check opposed by the Lieutenant's Discipline effort, with modifiers at the GM's discretion.

Episode 3: Survival of the Fittest
Before long it's time for the big announcement; Slarr declares that the Bothan was captured in Hutt Space without permission, and for that he shall suffer death, in the form of a hunting contest. Any beings who are interested are permitted to form teams, each of which is led down to the repulsor-garage to load onto a skiff. While they are preparing, the Hutt and many of his courtiers board his sail barge and head out to the hunting ground with the prisoner.


Once the sail barge reaches its destination, they release the Bothan at Area 0 and give him a blaster and a twenty-minute head start before the hunters set out on his trail. Unless given other instructions previously by the PCs, he start a fake trail leading into the jungle (3) before doubling back and entering the marshland (1), staying in the water and heading for the hills (2). Slarr's minions also release numerous camera droids so the Hutt can watch the hunt in comfort. 


The Hunt Begins
After the twenty-minute head start, the PCs and their rivals are allowed to begin the hunt. They can follow the coordinates they've been given until they reach Area 0, at which point they must use other tactics to find their quarry. If they haven't managed to communicate with the Bothan, then they should make Survival checks opposed by his Stealth efforts. Once they enter the terrain in which he is hiding, the PCs can make Perception checks, too. Of course, the other groups of hunters are doing the same thing, and might come snooping around the PCs if they're not having any luck. 


Boma Beasts
To make things even more exciting, Slarr has his handlers release the two boma beasts that the PCs brought him. These he also releases at Area 0 in the hunting grounds, to see if they are more efficient than the sentient hunters. They also make Survival checks to begin tracking the Bothan.

Boma Beasts (Rivals): Refer to page 36 of Operation: Shadowpoint for stats.

Developments
If they do find Ral'lya, the PCs need to decide just what to do with him. The direct approach, of course, is to take him aboard their skiff and make a run for it, but they might have other ideas requiring adjudication by the GM. Whatever the case, once Slarr realizes that he's been betrayed, he orders all of the other hunters to attack.

R2-DX
Ral'Lya's Astromech droid is also present for the festivities; it's been pressed into service slinging drinks on the Hutt's sail barge. The Bothan insists that the PCs help him acquire it before trying to leave Nal Hutta, since it has important astrogational data in its memory banks. This should present a challenge, but one the PCs can resolve through creative means, rather than by fighting their way through Slarr's entire entourage.

Ral'lya's Y-Wing
During the hunt there is also the matter of the Bothan's Y-wing fighter, which is parked on one of the nearby landing pads and covered with a weatherproof tarpaulin. R2-DX knows how to find it, or the PCs could interrogate one of the Hutt's minions. If they can recover it, then the PCs could use it as something of a wild card as this scene progresses.


Epilogue
As long as they can rescue Ral'Lya and his Astromech, recover the Y-Wing fighter and escape from Nal Hutta, the PCs score an important victory for the Rebel Alliance. In addition to saving one of its agents, they have acquired valuable information that can be used for planning future missions against the evil Galactic Empire.

Rewards for Risks
The PCs should earn 10 experience points each for success, or 5 if they fought the good fight but were unsuccessful. Additionally, those who played to their motivations could earn an extra 5 experience points.

Appendix 1: NPCs
Detailed below are some of the NPCs that the heroes can meet.

Slarr the Hutt (Nemesis)
Brawn 5 Cunning 4 Presence 3
Agility 1 Intellect 3 Willpower 4

Soak: 5
Wound Threshold: 17
Strain Threshold: 15
M/R Defense: 0 / 0

Skills: Brawl 1, Coercion 3, Computers 1, Cool 2, Core Worlds 1, Deception 3, Discipline 2, Education 1, Leadership 2, Lore 1, Melee 1, Negotiation 3, Outer Rim 1, Perception 3, Ranged—Light 2, Resilience 2, Streetwise 3, Survival 1, Underworld 3, Vigilance 2

Talents: Greased Palms, Grit, Know Somebody, Plausible Deniability, Rapid Recovery, Sound Investments x4, Toughened, Wheel and Deal x2

Abilities: Awkward, Ponderous (refer to page 407 of the core rulebook for details); Adversary 1

Equipment: None

Slarr Uwanesh Diann—although few know is kajidic name, and even fewer know his third name—is a relatively young Hutt, and an up-and-comer in the world of organized crime. Even so, he is a force with which to reckon in the galaxy. Slarr runs his organization out of his stronghold on Nal Hutta, and commands a growing ensemble of criminal beings. His activities include the production and distribution of illicit drugs, gunrunning (especially in the Corporate Sector) and slavery. Like others of his species, Slarr is ruthless in his pursuit of profit and power. While he is happy to share his ill-gotten gains with inferiors who prove useful to him, in the end he looks out only for himself.


Tenrep “Dianoga” Cray, Aqualish Captain (Rival)
Brawn 3 Cunning 2 Presence 2
Agility 2 Intellect 1 Willpower 2

Soak: 3
Wound Threshold: 14
Strain Threshold: 10
M/R Defense: 1 / 1

Skills: Athletics 2, Brawl 2, Cool 2, Coordination 1, Discipline 3, Gunnery 2, Leadership 3, Mechanics 1, Medicine 1, Melee 2, Perception 2, Piloting—Planetary 1, Piloting—Space 1, Ranged—Heavy 2, Ranged—Light 2, Resilience 2, Stealth 1, Survival 2, Vigilance 2

Talents: Command x2, Confidence, Field Commander, Improved Field Commander, Point Blank, Second Wind x2, Side Step

Abilities: Can breathe underwater; one free rank in Brawl; one free rank in Resilience; remove a setback die due to cold or wet conditions

Equipment: Armored clothing, blaster pistol, blaster carbine, comlink

Tenrep Cray earned his nickname, “the Dianoga,” as a guerilla fighter during sectarian violence, and then the Clone Wars, on Ando. He was one of the soldiers who remained loyal to the Republic, and was deeply disturbed by the apparent betrayal of the Jedi Order. In the aftermath of that experience he began working as a mercenary, selling his services to the highest bidder. Before long that led him into contact with Slarr the Hutt, and the Aqualish eventually became the crime lord's chief of security. Cray harbors no illusions about the morality of this business; he has grown cynical regarding noble causes, and now seeks little more than a comfortable life.


Aqualish Enforcers (Minions)
Brawn 3 Cunning 1 Presence 1
Agility 2 Intellect 1 Willpower 2

Soak: 5
Wound Threshold: 5 each
Strain Threshold: NA
M/R Defense: 0 / 0

Skills (group only): Brawl, Gunnery, Melee, Ranged—Heavy, Ranged—Light

Talents: None

Abilities: Can breathe underwater; remove a setback die due to cold or wet conditions

Equipment: Heavy clothing, blaster pistol, comlink

These thugs are oafish and none too bright, but effective in combat. They are quite loyal to Captain Cray, so it would take a good deal of persuasion for them to betray him.


Eom Nivlem, Gran Majordomo (Rival)
Brawn 2 Cunning 2 Presence 3
Agility 2 Intellect 2 Willpower 2

Soak: 2
Wound Threshold: 14
Strain Threshold: 12
M/R Defense: 0 / 0

Skills: Charm 2, Coercion 1, Computers 2, Cool 1, Core Worlds 2, Deception 3, Negotiation 2, Outer Rim 1, Perception 3, Ranged—Light 2, Skulduggery 1, Stealth 1, Streetwise 3, Underworld 2, Vigilance 2

Talents: Grit, Kill With Kindness x2, Plausible Deniability x2, Toughened

Abilities: One free rank in Charm or Negotiation; Enhanced Vision: Remove up to two setback dice from ranged attacks or Perception checks caused by environmental effects or concealment

Equipment: Comlink, datapad, blaster pistol

Eom Nivlem was once an important aide to the Imperial Senator from Malastare. With Palpatine's disbanding of the Senate, however, he found himself without a job. Never one to rest on his heels, the Gran sought out a young Hutt crime lord and offered his services. Perhaps to his own surprise, Slarr accepted. Now Eom serves as an emissary for the crime boss, providing access to circles in which the Hutt would not normally be welcome. To that end he travels through the galaxy, conducting negotiations and handing out assignments. Eom is ever the opportunist, and it won't be long before he starts using his influence in Slarr's organization to line his own pockets.


Evnik Ral'Lya: Use the stats for a Bothan Spy from page 412 of the Core Rulebook.

Traborn Yerg, Human Technician (Rival)
Brawn 2 Cunning 2 Presence 2
Agility 2 Intellect 3 Willpower 2

Soak: 2
Wound Threshold: 12
Strain Threshold: 12
M/R Defense: 0 / 0

Skills: Astrogation 1, Computers 3, Education 2, Gunnery 1, Mechanics 3, Piloting—Planetary 1, Piloting—Space 1, Ranged—Light 1, Skulduggery 2, Streetwise 1

Talents: Grit, Side Step, Solid Repairs, Speaks Binary, Tinkerer x2, Toughened, Utinni!

Abilities: One free rank in each of two non-career skills

Equipment: Blaster pistol, comlink, datapad, toolkit

At one time Traborn Yerg was a promising young tech working in the Corporate Sector. He was—and still is—gifted when it comes to building, repairing and modifying droids. In particular, he had a knack for gladiator droids, something that brought him to the attention of certain CorpSec higher-ups who enjoyed watching robots fight each other. While that made for quick promotions, it also ultimately led to his downfall. One of his droids went berserk, killing the Viceprex who'd bought it. In the aftermath, Yerg fled to Hutt Space. There he took a job as a technician, managing Slarr's comm center. At the same time, he continues to work on combat automata, and has recently finished a prototype droid bounty hunter. Although he is awkward in the presence of females, Yerg believes that his technical prowess makes him appealing to them.


Nikto Technicians (Minions)
Brawn 3 Cunning 2 Presence 2
Agility 2 Intellect 1 Willpower 2

Soak: 2
Wound Threshold: 5 each
Strain Threshold: NA
M/R Defense: 0 / 0

Skills (group only): Athletics, Brawl, Computers, Perception

Talents: None

Abilities: NA

Equipment: Clothing

These technicians are recruited from the ranks of the servants and trained by Traborn Yerg to work in the palace's comm center. Because they know they've been spared from more difficult tasks by him, that gives Yerg some influence over them. He hasn't been willing to exploit that arrangement, however, because of the security that working for Slarr gives him.


Appendix 2: Opening Crawl
Presented below is an opening crawl in the style of the Star Wars movies for use with this scenario.

STAR WARS

AGE OF REBELLION

TERRITORY

It is a time of civil war.

While scouting new routes through hyperspace on the Outer Rim,

a Bothan spy has been captured. Now the Rebel Alliance

sends a Special Operations team into the court of Slarr the Hutt

in a desperate attempt to rescue him...


Thursday, January 2, 2020

Starting Off the New Year Right!

Last night we started off the New Year right, playing some Star Wars with the old d6 System rules.


It was a relatively simple mission, heading to a backwater planet to rescue a Rebel operative who'd attracted unwanted attention.


After finding the agent in the forest, we headed back to the spaceport.


Imperial stormtroopers and a Trandoshan bounty hunter were waiting for us!


We managed to blast our way through and escape from the planet.

-Nate

Monday, December 23, 2019

Tierfon Mission: Provisions

During what should be a routine supply run to the planet Ansion, the PCs discover Imperial oppression, and have a chance to oppose it.


Star Wars: Age of Rebellion: Provisions
There's an old saying that “an army marches on its stomach.” While that might be outmoded, what with the multi-faceted nature of interplanetary warfare, it is still in essence true. Without a solid supply of food, military forces on the ground, in the air and in space are not going to be successful. To that end, the Rebel Alliance invests considerable effort in obtaining and distributing adequate foodstuffs for its members. The Galactic Empire is always on the lookout for those who would thus supply the Rebels, however, and cracks down whenever it suspects someone of aiding and abetting the Alliance.

Adventure Summary
This adventure begins while the PCs are visiting the spaceport known as Savannah Landing on the planet Ansion, where they've been sent to pick up a cargo of food supplies for Tierfon Base. There they witness a fight between a local nerf rancher and some thugs, a conflict in which they can intervene. If they do so, then the Human they save asks them to provide even more aid in dealing with pirates who've been stealing nerfs and supplies of grain from the ranchers and farmers. That, in turn, leads to a confrontation with the pirates themselves, and thus with the Imperials who support them.

Planning and Preparation
This scenario can really begin in media res for the PCs, since it seems like a routine cargo pickup. While they might have procured items that they've been seeking for some time—especially if their a newly gained Contribution Rank has granted them some kind of reward—the drama of the situation is best served by having them be caught completely off-guard.
As detailed below, PCs with technical skills could be part of efforts to create clean aliases for the Player Characters and their starship(s).


Involving the Player Characters
This scenario assumes that the PCs are part of a Special Operations team working out of Tierfon Base. If that is not the case, then the GM might need to do a little extra work to weave them into the events of this mission.

Mission Objectives and PC Duty
Detailed below are some of the ways in which this assignment can tie into different characters' objectives.
  • Combat Victory: This mission provides plenty of opportunity for fighting.
  • Counter-Intelligence: Given that the PCs have been building names for themselves as a Rebel Special Operations team, it behooves characters with this Duty to make sure that they don't blow their aliases and cover stories.
  • Intelligence: The fact that the Empire is paying pirates to prey upon independent farmers and nerf ranchers could have considerable influence on those locals who are doing business with the New Order.
  • Internal Security: Characters with this Duty should always be on the lookout for any signs of subterfuge.
  • Personnel: As always, characters with this duty can look out for their fellows and help ensure success for the whole team.
  • Political Support: Depending on how it develops, this mission could provide an opportunity to win over the hearts and minds of a population that suddenly sees its fellows suffering Imperial persecution.
  • Recruiting: In the same way, it's a good chance for the PCs to recruit like-minded individuals from among the locals to the cause.
  • Resource Acquisition: As mentioned above, providing a supply of quality foodstuffs is vital to supporting the Rebellion.
  • Sabotage: Revealing the way in which the Empire is manipulating the population of Ansion would be a considerable setback to it, indeed.
  • Space Superiority: In the end, this mission is bound to include a battle with local TIE fighters and perhaps even other vessels.
  • Support: The many challenges presented by this mission provide ample opportunities for PCs with this Duty to aid their comrades in arms.
  • Tech Procurement: Meeting this Duty is, admittedly, a bit of a stretch for this mission, but the GM can always tailor the scenario accordingly.

Episode 1: A Backwater Planet
The action begins at Savannah Landing on the planet Ansion, where the PCs have been sent to pick up the cargo of foodstuffs. This is a world with only a small Imperial presence; indeed, the surrounding airspace is patrolled by TIE fighters from the local garrison, without any capital ships in orbit. 

Refer to the map below for a layout of Savannah Landing. 


The Cargo Inspector
When they first land, the PCs find their ship approached by the local customs inspector, Rowan Hobb, who is accompanied by a small squad of stormtroopers. This is a chance to test the PCs' aliases as well as any false credentials that they've prepared, with them making Computers and Deception checks opposed by the inspector's Perception efforts.

Inspector Hobb (Rival): Use the stats for a BoSS Agent from page 416 of the Core Rulebook.

Stormtroopers (Minions—one per PC): Use the stats from page 420.

This encounter should make the PCs sweat a little bit, and perhaps necessitate some good roleplaying, but not present any real danger. If the situation for some reason takes a bad turn, then Inspector Hobb can readily summon another squad of troopers led by a sergeant, with more reinforcement available after a longer delay.

The Fight
Once the PCs are moving around the Landing, however, they run into the real conflict. An average Perception check reveals the sound of a fight coming from the narrow alley between the two buildings in the center of the facility; this is a nerf herder, Tamric Raal, being roughed up by a band of pirates.

Tamric Raal (Minion): Use the stats for a Nerf Herder from page 433 of the core rulebook.

Pirates (Minions—one per PC): Use the Pirate Crew stats from pages 425-6.

The Cantina and the Warehouse
This scenario assumes that the PCs don't need to spend too much time exploring Savannah Landing, since they'll soon head out to the open plains. Should the GM need layouts of the cantina and the warehouse, however, one can easily use the facilities detailed in the scenario “Firestorm;” a map of the docking bay can be found in either “Plunder” or “Legacy.”


If they rescue him, then Raal asks the PCs if they can help him and his fellows protect themselves against the pirates, and possibly eliminate their threat once and for all. While he cannot himself offer much by way of compensation for doing so, he is confident that many of his fellow farmers and ranchers would happily do business with the Rebellion if given the opportunity. 


Episode 2: Local Troubles
As long as the PCs are willing to assist Tamric Raal, he can lead them out to his ranch, where more of the locals, along with his sister and himself, can tell more of their story. Tamric has an Aratech cargo skiff that he uses for hauling goods, or the PCs can use their own vehicle(s). The ride to the ranch is a beautiful one, crossing seemingly endless fields of grass and grain, with the occasional stream and copses of trees.

Cargo Skiff: Refer to page 447 in the Core Rulebook for stats.

Raal Ranch
Refer to the map above for the following location descriptions. The ranch consists of the main house (1), which has a small main room (A) with a refresher (B) and storage room (C); there are also a small kitchen (D), pantry (E) and two bedrooms (F and G). There are also a pen and barn for the nerfs (2), and a small shed (3) for storing the ranch's skiff and other supplies. 

Once they arrive, the PCs and Tamric are met by his sister, Nili, along with others assembled from nearby farms and ranches. They are eager to tell of their woes, as detailed below.

Nili Raal: Use the Nerf Herder stats from page 433 of the Core Rulebook.

The Story
As long as the PCs are able to rescue Tamric, he tells the following tale; the GM can present these details in a conversational manner, or more like a briefing.
  • For generations the farmers and ranchers in this area have brought their goods to Savannah Landing, for sale to offworld buyers.
  • Recently, however, Inspector Hobb arrived on the scene and began buying those products in the name of the Empire.
  • At the same time, visits from independent buyers become much more rare.
  • What is more, those sellers who sought to meet with vessels on their own territory found that they began to suffer attacks from ruffians.
  • Hobb maintains that it is quite safe to do business at the Landing, but that the Imperial forces on Ansion just aren't adequate for guarding any business that is transacted in more remote locations.
  • As long as the PCs does Raal add that he believes this is a way to prevent the locals from selling their foodstuffs to the Rebel Alliance.
  • Since the pirates travel by repulsorcraft, the locals suspect that they have some hideout not far from the ranches.
This information should raise some questions in the minds of the PCs. The truth of the matter is that many of the people of Ansion are comfortable with selling their goods to the Empire, but wish that they had a more diverse market. They appreciate the sense of law and order provided by Imperial rule, but are open to the idea of having fewer restrictions on their business. To that end, they might be persuaded to speak out against such limitations, if they could be shown how to do so.

The Pirates
At some point during this assembly, some of the pirates arrive to harass the locals. Several of them come riding in on Nebulon-Q swoops, firing into the nearby ground and sweeping in circles to inspire fear. Others follow in another cargo skiff, ready to take meat, grain and other supplies from the locals. This time they should be in for a surprise, however, as they find a Rebel Alliance SpecOps team waiting for them.

Pirates: Use stats from page 433 of the Core Rulebook.

Nebulon-Q Swoops: Use stats from page 51 of Stay on Target.

Cargo Skiff: Refer to page 447 in the Core Rulebook for stats.

This encounter can turn in a number of directions. If the PCs make a strong stand against them, then the pirates attempt to flee. All the while they shout threats: “You've made a mistake this time! You'll be sorry for it! Just wait!” Even so, the PCs can give chase, either in the Raals' skiff, on stolen swoops or by other means. In this way, the pirates could even lead the PCs back to their hideout, since that is where they head. To that end, they could also plant some kind of tracking device aboard a swoop or on one of the surviving pirates, in order to learn their destination. 


At this point, then, the PCs have a couple of options. The locals tell them that the pirates have been amassing stolen foodstuffs, and thus should have quite the stockpile in their hideout. If the PCs would help them recover the goods, then they'd happily share with the Rebel Alliance—and make arrangements for more business in the future. On the other hand, they could also hunker down at the ranch, preparing defenses during a montage scene in order to repulse the retributive strike that is most assuredly coming.

The Hideout
Refer to the map above for the following location descriptions. The hideout is located in a copse of trees, covered by camouflage netting (A). It consists of two small shelter units (B), each with a dozen bunks, tables and refreshers. There is also a unit for storage (C), and another that has been converted into a makeshift mess hall (D). Parked between them is the Stellar Wind, a Wayfinder-class transport, along with a pair of battle-scarred Z-95 Headhunter starfighters, that the pirates use for making their attacks. 

When the PCs arrive there are four groups of three pirates, led by Atisako Fellum, their Gran captain. They don't kindly to interlopers on what they see as their territory, of course, and state a rousing defense. Even so, should they come to believe themselves outmatched, they are willing to grab what they can and make a run for their ship—holing up and firing the ship's canons, if necessary—and then launch for space, figuring that their business on Ansion is finished.

Pirates: Use stats from page 433 of the Core Rulebook.

Atisako Fellum, Gran Pirate (Nemesis)
Brawn 2 Agility 3 Intellect 2 Cunning 2 Willpower 2 Presence 3

Soak: 3 Wound Threshold: 14 Strain Threshold: 12 M/R Defense: 0 / 0

Skills: Astrogation 2, Athletics 1, Brawl 2, Charm 2, Coercion 1, Cool 2, Coordination 1, Discipline 2, Gunnery 2, Leadership 2, Mechanics 1, Medicine 1, Melee 3, Negotiation 2, Perception 2, Piloting—Planetary 1, Piloting—Space 2, Ranged—Heavy 2, Ranged—Light 3, Resilience 1, Skulduggery 1, Stealth 1, Streetwise 1, Vigilance 2

Talents: Call 'Em, Dodge, Grit, Lethal Blows, Quick Strike, Quick Draw, Rapid Reaction, Toughened

Abilities: Free rank in Charm or Negotiation; Enhanced Vision (remove up to two setback dice from ranged attacks and Perception checks due to environmental conditions; Adversary 1 (upgrade combat checks against this character once)

Equipment: Vacuum suit (counts as heavy clothing), heavy blaster pistol, vibrosword, comlink


The Stellar Wind: Refer to page 258 of the Edge of the Empire Core Rulebook for stats.

Z-95 Headhunters: Refer to page 263 of Edge of the Empire.

Episode 3: Bigger Problems
What the PCs may or may not realize is that Fellum and his pirates can also call in Imperial support. This the Imperials justify with the excuse that they're trying to maintain law and order, and that all parties involved in this conflict will have a fair hearing. (In truth they have no such intentions, of course—especially if they can reveal agents of the Rebel Alliance.) To that end, they respond by sending a Gozanti light assault cruiser to the location of the pirates' base.

TIE Fighters—Use the stats found on page 270 of the core rulebook.

TIE Pilots—Use the stats found on page 423.

Gozanti Cruiser—Use the stats found on page 276.

Imperial Gunners—Use the stats found on page 418.

Lockdown
At the same time, Rowan Hobb tries to lock down Savannah Landing—especially if the PCs' ship is still parked there. He seals both doors into the compound and places stormtroopers inside and outside.

Inspector Hobb (Rival): Use the stats for a BoSS Agent from page 416 of the Core Rulebook.

Stormtroopers (Minions—one per PC): Use the stats from page 420.

He also calls in support from the local garrison, in the form of speeder-bike-mounted scout troopers and, eventually, AT-ST and AT-AT walkers.

74-Z Speeder Bike: Use the stats from page 263.

Scout Troopers: Use the stats from page 422.

AT-AT Walker: Use the stats from page 264.

AT-ST Walker: Use the stats from page 265.

Imperial Vehicle Corps: Use the stats from page 419.


Epilogue
Success on this mission allows the PCs to acquire vital supplies for the Rebel Alliance. Additionally, they might also be able to win over the people of Ansion, as detailed above—a possibility that could be the impetus for future missions.

Rewards for Risks
The PCs should earn 10 experience points each for success, or 5 if they fought the good fight but were unsuccessful. Additionally, those who played to their motivations could earn an extra 5 experience points.

Appendix 1: Opening Crawl
Presented below is an opening crawl in the style of the Star Wars movies for use with this scenario.


STAR WARS

AGE OF REBELLION

LEGACY

It is a time of civil war.

When a team of Rebel operatives is sent to procure food supplies,

it should be an easy mission. They are about to learn, however,

that the people of Ansion are living under dire oppression,

and only bold action can let them be free...


Wednesday, December 18, 2019

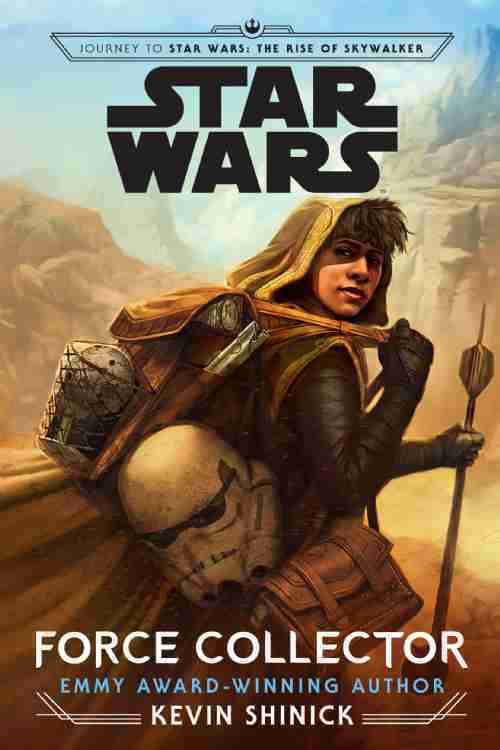
Force Collector


Just finished another Young Adult book, Force Collector (Kevin Shinick, 2019). While set in the Sequel trilogy era, this one is out in the middle of nowhere, so it doesn't run afoul of too much of the stuff with which I disagree. 

This is a sort of coming of age buddy story about a pair of teenagers and a droid. They have reason to travel to all sorts of Star Wars locations as seen in the movies. They visit Jakku before Rey steals the Falcon, they find themselves on Takodana before Maz Kanata's castle is destroyed, they even have a chance to visit the new Disney theme park and meet Dok-Ondar. A kind of fun romp along to familiar locales, even if the motivations for the galaxy-spanning trip don't quite make sense.

Part of the "Journey to Rise of Skywalker" series. I have no idea how this helps to set up the movie...perhaps more will become clear after we see the film tomorrow night.

Sunday, December 8, 2019

Tierfon Mission: Legacy

This Tierfon Mission sends the heroes back to Corellia, where they can solve a mystery and make a discovery of tremendous importance to the Rebellion.

-Nate


Star Wars: Age of Rebellion: Legacy
The Clone Wars wrought many changes on this galaxy, including the transition from the Old Republic to a New Order, the end of the Jedi, and more. Even so, remnants of what used to be still remain, providing a link to the past for those who can find them. Such is the case with a Neti Jedi named Obah, who was betrayed and murdered on the planet Corellia. Although her life was cut tragically short, the power of the Force was with her—and can be with those who stand against the tyranny of the Galactic Empire.

Adventure Summary
This adventure begins when the PCs are contacted by a like-minded being from Corellia, a Drall historian named Emiss who has heard of their exploits and wishes to aid them in their efforts. To that end, he reaches out to various contacts, eventually finding a Rebel sympathizer who can make contact with Tierfon Outpost and ask for a meeting. They can have the meeting at a cantina on the beach, where the Drall presents them with an old comlink. Using it, the PCs can track a weak but persistent signal down into the sewers beneath Coronet City, where—after facing a number of hazards—they find a similarly old R2 unit. It presents them with a test, a hologram of its old mistress, and if they pass it is willing to accompany them. That is when agents of the Empire arrive on the scene, however. During the ensuing battle, the PCs learn that the droid harbors one more secret: Obah's lightsaber.


Planning and Preparation
While at Tierfon Outpost, the PCs are called in for a meeting with Major Kento Moorla and Lieutenant Juno Bast. It is the latter who presents them with a cryptic message that she recently received.

Recently a band of freedom fighters scored a daring coup on Corellia. If they are willing to take another such risk, I have an opportunity for them to help guard the peace and justice in our galaxy.

There is a date and time connected with this potential meeting, one that gives them a little time to prepare if they want to keep the appointment. Given that, they might be able to requisition some equipment items, at the GM's discretion, before boarding their ship and taking flight. Whatever the case, they are given an Ubrikkian cargo skiff for their use on this mission.


Involving the Player Characters
This scenario assumes that the PCs are part of a Special Operations team working out of Tierfon Outpost, and that they participated in the events of the scenario “Turncoat.” If either of those assumptions is not the case, then the GM may need to do some additional work in order to weave them into this mission.

Mission Objectives and PC Duty
Detailed below are some of the ways in which this assignment can tie into different objectives.
  • Combat Victory: While more limited in scope than some other missions, this one still presents good opportunities for taking the battle to the Empire.
  • Counter-Intelligence: The need for discretion and stealth on this mission is a perfect fit for characters with this duty.
  • Intelligence: The secrets possessed by Obah's R2 unit and the holograms it has recorded could be a major score for the Rebellion.
  • Internal Security: Given the stakes of what the PCs might accomplish here, it is vital that PCs with this duty guard against any potential treachery.
  • Personnel: As always, characters with this duty can look out for their fellows and help ensure success for the whole team.
  • Political Support: What the PCs stand to learn from success here could allow them to rally like-minded beings under the banner of the Rebellion.
  • Recruiting: While the PCs aren't likely to win over any organic recruits from this mission, they can still gain the posthumous aid of a potent ally.
  • Resource Acquisition: As mentioned above, the recordings carried by the R2 unit are of immense value to the Rebellion.
  • Sabotage: Success for this mission creates a major setback for those who want to stamp out any remaining sparks of the Jedi Order.
  • Space Superiority: Any time the PCs need to escape from a world, there's a chance to cause harm to the Imperial Navy.
  • Support: The many challenges presented by this mission provide ample opportunities for PCs with this duty to aid their comrades in arms.
  • Tech Procurement: Although the R2 unit might seem like a small prize, the secret that it contains is a truly important acquisition.

Episode 1: A Fellow Enthusiast
As they approach Coronet City on Corellia, the PCs are haled and asked to identify themselves as well as their business here. This is a chance to make Computers checks for forging fake identifications, and Deception to tell a convincing stories. Assuming that they are allowed to land—in a docking bay that is detailed below—then they can head out to the appointed meeting.


The Downtime Cantina
The meeting takes place at the Downtime Cantina, which sit on Corellia's noted Gold Beaches. It is a small structure with a main room boasting several tables and a bar (A), and a small back room (B).
When the PCs arrive, they find a variety of being relaxing and having drinks. There is only one Drall, however, and that is Emiss. He addresses the PCs in a nonchalant way, using vague hints to establish that they are his intended contacts. Once he is satisfied, he presents the item that he has found—an old-style comlink. Pinging it evokes a return signal, albeit a weak one. With this, along with a successful hard Computers check, the PCs can track the origin of the signal back into Coronet City—indeed, back into the disreputable Blue Sector of that location. Once the PCs set out for that area, continue in the next section. 

What is more, although the Imperials are not yet alerted to the presence of the PCs, the GM should feel free to have them make Perception checks opposed to unknown Stealth or Deception efforts in order to build the tension during this scene.


Episode 2: Down and Out in Coronet City
Once they head back into the sprawling metropolis, the PCs should make an average Computers check in order to keep tracking the signal. Eventually it leads them to a place where it seems to emanate from beneath them. At that point, those who succeed at easy Core Worlds checks recognize that there is an extensive sewer system beneath the city, and that the source of the transmissions can probably be found down there.

The Storm Sewers
Use the map above as a general layout for the tunnels that crisscross beneath Coronet City; each of the following suggested encounters fits a different section. Note that this scenario doesn't present a complete map of the sewers; rather, the different locations in the maps, above, should be used as set pieces for the following encounters. 

At one point the PCs run into a number of duracrete slugs that are feeding on the walls of the tunnel; they must fight their way through them in order to continue on their intended route.

Duracrete Slugs (Rival): Refer to page 22 of the Under a Black Sun PDF for stats.

Inclement Weather
While the PCs are exploring the sewers, it starts to rain back up on the surface. At first this means little to the PCs, but as time passes the flow of water becomes more of a challenge. In game terms, this causes the tunnels to be treated as difficult terrain, as detailed on page 227 of the Core Rulebook.

Imperial Pursuit
Some time later, the PCs should make Perception checks opposed to the Stealth efforts from a squad of stormtroopers. Having identified the party's vessel, they begin their efforts at finding, cornering and neutralizing this band of Rebels.

Stormtroopers (Minions): Refer to page 420 in the Core Rulebook for stats.

Stormtrooper Sergeant (Rival): Refer to pages 420-1 in the Core Rulebook for stats.


Episode 3: New Friends and Old Foes
Eventually the PCs find an old astromech droid that once served Obah the Neti, and now survives beneath the surface of Coronet City by splicing himself into available power sources and performing self-maintenance. This moves the mission into its final stages.

The Droid
R2-D0 served Obah the Neti faithfully during her career in the Jedi Order, even when she decided to leave behind the call to arms of the Clone Wars so that she could better serve the scrumrats living on Corellia. After the transmission of Order 66, which caused clone troopers to turn on their Jedi leaders and thus led to the downfall of the Jedi, Obah tasked D0 with recording as much of her teachings as was possible, before she was killed by criminals. For that reason, the droid is prepared to test those who want its assistance, so as to know if they are worthy.

R2-D0 (Rival): Refer to page 428 in the Core Rulebook for stats.

The Test
Once D0 believes he can trust the PCs—which requires an average Negotiation check, with boost or setback dice assigned for good or bad argumentation or roleplaying—the droid projects a holographic recording of Obah, in which she speaks a single phrase. If the PCs can answer with the correct response, then she moves on to the next phrase.
  • She says, “There is no emotion.” The answer is, “There is peace.”
  • She says, “There is no ignorance.” The answer is, “There is knowledge.”
  • She says, “There is no passion.” The answer is, “There is serenity.”
  • She says, “There is no death.” The answer is, “There is the Force.”
An average Lore check can recognize these phrases as being part of the old Jedi Code. As long as one or more of the PCs can provide the correct responses, R2-D0 agrees to go with them. Failing that, they might need to subdue the droid.


Back to the Surface
Once they exit from the sewer tunnels, the PCs need to make their way back to the docking bay in which they landed. The problem here is that there are more Imperial stormtroopers assigned to guard this location, so the PCs must sneak past or shoot their way through them.

Stormtroopers (Minions): Refer to page 420 in the Core Rulebook for stats.

Stormtrooper Sergeant (Rival): Refer to page 420-1 in the Core Rulebook for stats.

Relic of the Past
At a dramatically appropriate moment, R2-D0 reveals one more secret that it has been keeping: Obah's lightsaber. It tootles in Binary at the character who can most likely wield the weapon, and then opens its storage compartment to reveal the lightsaber. When the time is right, D0 launches it toward the character best prepared to use it.

Off into Space
Given the fact that this planet is home to the Corellian Engineering Corporation and its shipyards, there are plenty of Imperial vessels in orbit. For that reason, the PCs face numerous TIE fighters as they make their exit. At the GM's discretion, if the PCs have built enough of a reputation through their previous activities, then the Empire could even send one of its aces after them.

TIE Pilots (Minions): Refer to page 423 in the Core Rulebook for stats.

TIE Ace (Rival): Refer to page 423 in the Core Rulebook for stats.

TIE/ln Fighters: Refer to page 270 in the Core Rulebook for stats.


Familiar Faces?
If the PCs participated in the events of the scenario “Turncoat,” then an old enemy, ISB Lieutenant Ennis Dul'Tir—assuming that he survived the encounter—could show up here, helping to build him up as a recurring enemy.


Epilogue
Success can gain some important resources for the Rebel Alliance, while failure could lead to capture, imprisonment, or worse.

Rewards for Risks
The PCs should earn 10 experience points each for success, or 5 if they fought the good fight but were unsuccessful. Additionally, those who played to their motivations could earn an extra 5 experience points. Finally, any character who is Force-sensitive gains a tremendous opportunity to learn more about the ways of the Jedi, including the acquisition of their signature weapon.


Appendix 1: Opening Crawl
Presented below is an opening crawl in the style of the Star Wars movies for use with this scenario.


STAR WARS

AGE OF REBELLION

LEGACY

It is a time of civil war.

A mysterious discovery on the planet Corellia leads Rebel heroes into

a decades-old mystery, one that could lead them into a trap,

or that could provide them with a powerful new weapon to use

in their battle against the Galactic Empire.