***
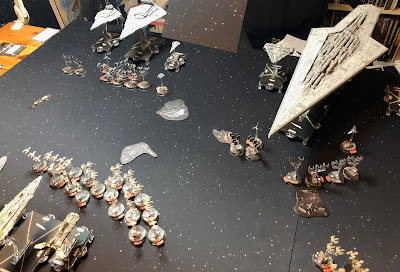
I realized a number of things I did wrong during this epic battle. One of them is on display in the first picture below: I did not place the Imperial starfighter squadrons in front of Executor within distance 1-2 of both the huge ship and the Imperial deployment zone. There were a number of minor rules issues I ran across during and after this engagement.
Pregame Notes
I took notes before, during, and after the game. I tried to envision what, exactly, each of these ships and squadrons was supposed to be doing in this massive battle.
 |
| Both fleets, arrayed for war |
Empire
The main goal is, according to the Station Assault objective card, for the Empire to protect the two stations. With that in mind, my plan was to send the Imperial squadrons deep, to flood around the station to protect it from Rebel starfighters. Executor and Stronghold (the Quasar Fire-class cruiser carrier) would keep a few squadrons aboard, in reserve, and attempt to deploy them later via the Rapid Launch Bays upgrade.
Executor was to target and destroy Liberty and Independence, at a minimum, while the Victory-class star destroyer Warlord would pair with the Chimaera to hammer Profundity and Independence as needed.
 |
| The Imperial right flank (Warlord, Chimaera, Executor) |
On the other flank, Devastator and Dominator (a Victory-class on Devastator's left) were tasked with getting close and mauling Rebel ships as Corrupter (the Victory-class between Devastator and Executor) would try to support the larger ship's in protecting their flanks. Two Arquitens-class light cruisers (Thunder Wasp and Centicore) on the far edge would also try to protect the flanks. The Empire does not want any pesky Rebels getting behind their angry white triangles!
 |
| The Imperial left flank (Executor, Corrupter, Devastator, Dominator). |
Rebels
The Empire wants to keep its deployment zone free of Rebel ships...but Admiral Ackbar would dearly love to get some of the speedier vessels back there as soon as possible. Three CR90s (Dodonna's Pride, Jaina's Light, and Tantive IV) and the MC30c Providence, for instance, are great candidates for this end around maneuver. A number of other ships on the Rebel right flank are poised to engage the station (Nebulon-Bs Yavaris and Redemption, Sphyrna-class Hammerhead Consonance) in support of the wave of starfighters. Home One will bring up the rear, hoping for some sweet double broadsides action late in the game.
 |
| View of the Rebel left flank (Home One) |
 |
| Liberty, set up right in the middle of the Rebel line |
 |
| View of the Rebel left flank (Profundity and Independence) |
The next post will follow the action into Turn 1!
No comments:
Post a Comment